Getting Started with Google OAuth
A beginner-friendly walkthrough of setting up Google OAuth and understanding the authorization request

Getting Started with Google OAuth
Today, I decided to try setting up Google OAuth and found that the process was very similar to GitHub OAuth. In this article, I'll be simplifying the process and walking you through the entire setup.
Stay with me.
Like I always say, when interacting with APIs, the most essential thing is to read the API's documentation. Almost everything you need to know about how the API endpoints are structured is already documented there.
Understanding the Authorization Request
Before we start building anything, let's first understand the parameters Google expects when redirecting a user to its authorization endpoint.
client_id
This is used to identify the application making the request so Google can display the correct application name and logo to the user.
redirect_uri
This is the callback URL where Google redirects the user after they approve the login request.
Remember, just like GitHub OAuth, this callback URL must be one of the redirect URIs you registered in your Google Cloud Console.
response_type
This instructs Google to send a temporary authorization code back to our callback.
GitHub sends this authorization code automatically, but Google requires us to specify it explicitly by setting:
response_type=code
scope
This specifies the permissions our application is requesting.
Example:
scope=openid email profile
- openid — Tells Google we want to use OpenID Connect (OIDC), the industry-standard identity layer built on top of OAuth 2.0.
- email — Gives us access to the user's email address.
- profile — Gives us access to the user's basic profile information.
state
This is a randomly generated cryptographically secure token used to protect our request from CSRF (Cross-Site Request Forgery) attacks.
code_challenge & code_challenge_method=S256 (PKCE)
code_challenge
A hashed version (SHA-256) of a secret verifier string.
code_challenge_method
This tells Google the hashing algorithm used. It should always be:
S256
Why?
This implements PKCE security. PKCE (Proof Key for Code Exchange), is an additional security layer for OAuth 2.0. Google stores this challenge temporarily. Later, during the callback, our server sends the original verifier string.
Google hashes the verifier again and checks whether it matches the stored challenge.
If a hacker intercepts the authorization code while it's being sent back to our application, they still cannot exchange it for tokens because they don't have the original verifier stored securely in the user's browser cookie.
prompt
This controls Google's login behavior.
It forces Google to display the account selection screen every time.
Unlike GitHub, which simply authenticates using whichever account already has an active session, Google allows us to force the account picker.
The Google OAuth flow can be broken into two simple steps:
- Authorization
- Callback
Let's Summarize the Authorization Flow
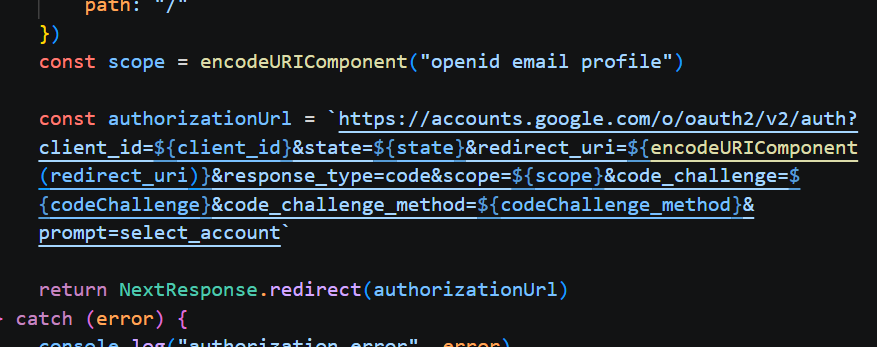
When a user clicks Continue with Google, our server redirects them to Google's authorization endpoint. After the user successfully authorizes the request, Google redirects them back to our redirect_uri (callback).
https://accounts.google.com/o/oauth2/v2/auth
The request contains query parameters such as:
stateredirect_uriscoperesponse_typeclient_idcode_challengecode_challenge_method=S256prompt
Step 1: Getting Your Google Cloud Credentials
Go to:
https://console.cloud.google.com/
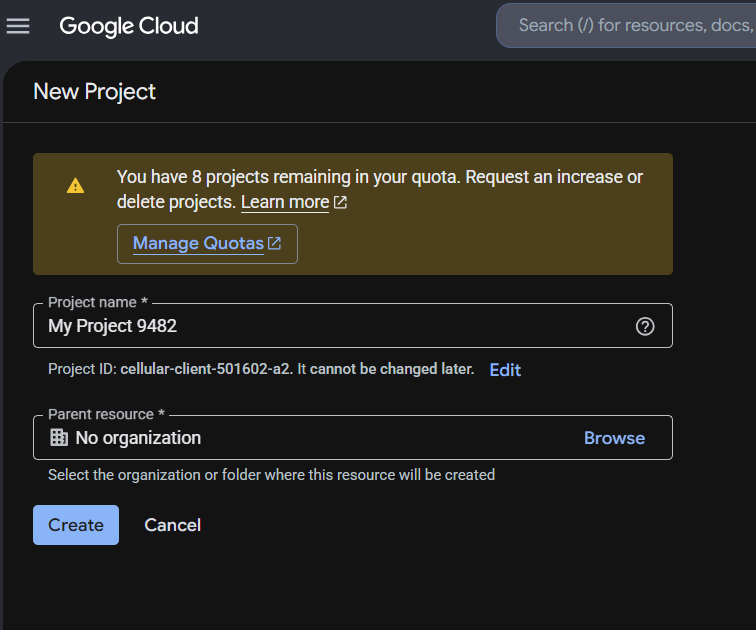
Create a new project and give it a name. Google allows us to create up to 10 projects on the free tier.
Navigate to:
APIs & Services → OAuth Consent Screen
Or simply search for OAuth Consent Screen using the search bar.
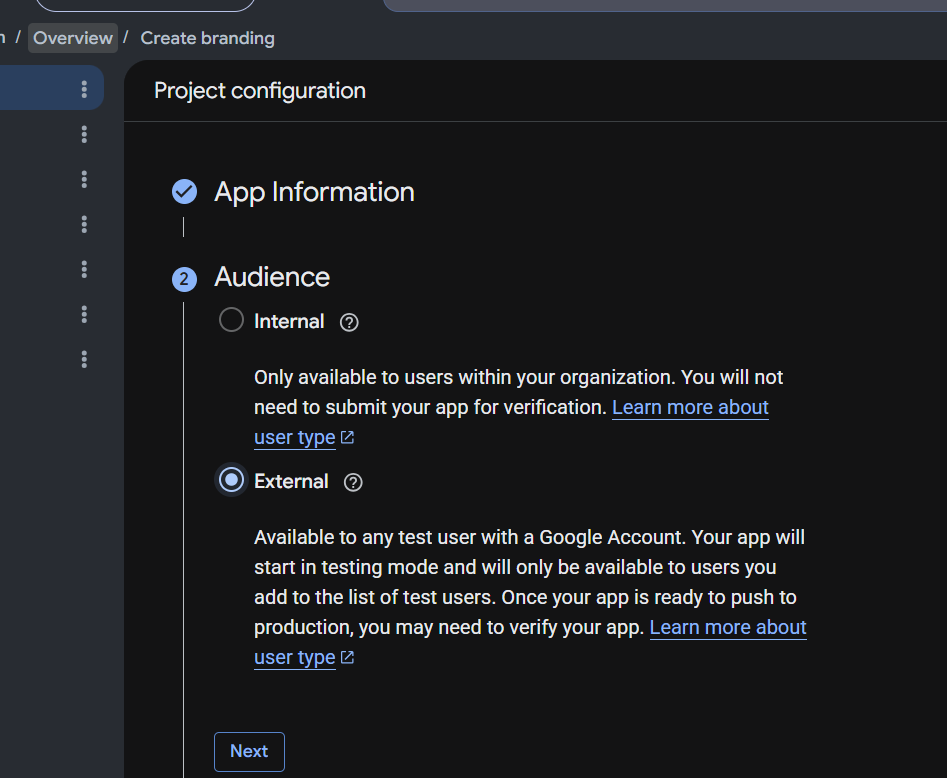
Choose External. This means any Google account can authenticate with your application.
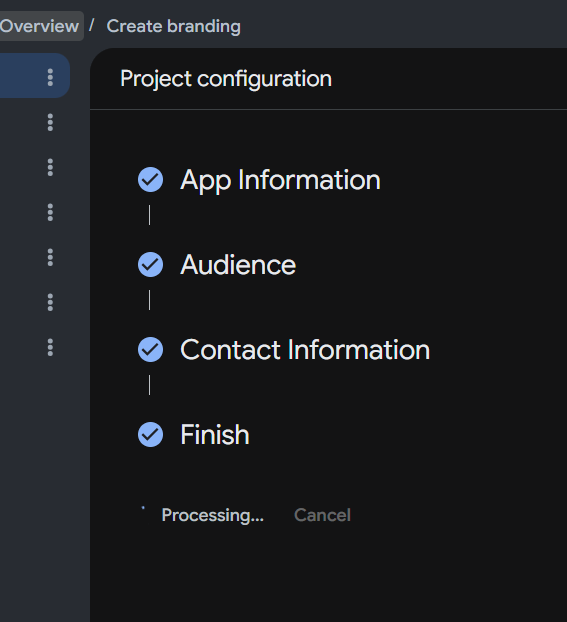
Fill in the following fields:
- App name
- User support email
- Developer contact information
Click Save and Continue.
Next, go to the Credentials tab.
Click + Create Credentials, then select OAuth Client ID.
Set the application type to Web application.
Fill in:
- Application name
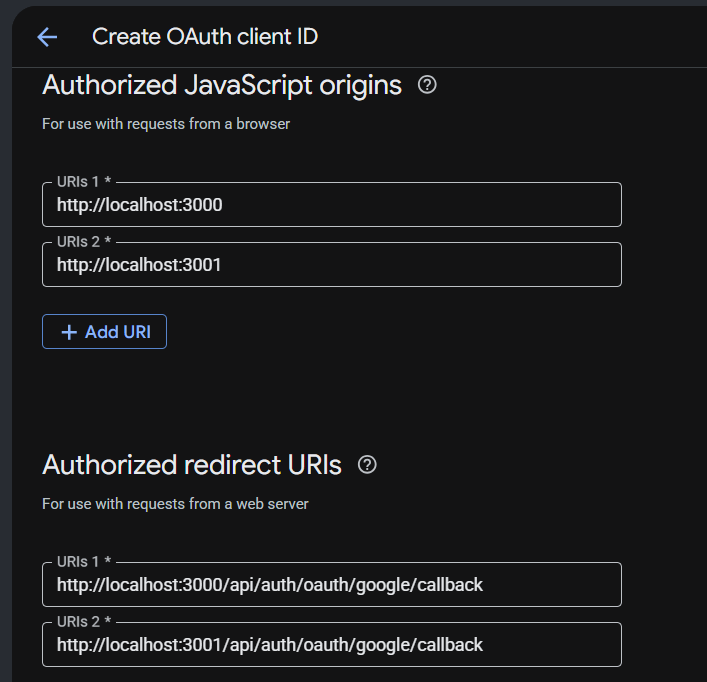
- Authorized JavaScript Origins
For development, this could be:
http://localhost:3000
For production:
https://yourdomain.com
Then add your Authorized Redirect URI.
Finally, click Create.
Google will generate your:
- Client ID
- Client Secret
Copy both into your project's .env file.
We'll use these credentials in the next step when constructing our Google authorization URL.
GOOGLE_CLIENT_ID=your_client_id
GOOGLE_CLIENT_SECRET=your_client_secret
Conclusion
At this point, we've configured our Google Cloud project and understood the parameters involved in Google's authorization request.
In the next article, we'll dive into the implementation logic, where we'll generate the required values, construct the authorization URL, and redirect users to Google for authentication.
If you have any questions, suggestions, or notice anything that could improve this article, your comments are highly encouraged. I'd love to hear your thoughts and continuously improve the quality of this series.
Comments (0)
No comments yet. Be the first to share your thoughts.